
This certainly isn’t the first time this has ever been done on a sedan, in fact this thread here was posted some time ago with some insight and a bit of “how to” and it certainly gave me enough “it can be done” motivation to do take this little project on.
National Speed: 2009 Cadillac CTS-V - Fitting a 325/30R19 on stock wheels... - LS1TECH
Although the forum link in that thread was pretty informative, it does leave out some items and I wanted to post a thorough thread on my experience of fitting 325/30/19 rear tires on my sedan successfully in case others are willing to take it on. This will be quite the “TriTexan” post with plenty of detail and pictures...(bustin’ your chops Tri, enjoy your posts and detailed input brother).
I apologize for the bandwidth consuming thread, and thorough detail, but for those interested in doing this mod you'll appreciate it.
This is not a bolt-on deal by any means, so if you want to do this, plan, prepare, and be patient.
There’s been many who have done the move the OEM CTS-V sedan rear 19” x 9.5” to the front and widen the OEM CTS-V sedan front 19” x 9” and move it to the back, my process with that was no different.
- OEM CTS-V Sedan front 19” x 9” sent to Eric Vaughn to be widened to 19” x 11”
- OEM CTS-V Sedan rear 19” x 9.5” to be used as new front rims
Eric Vaughn’s work is truly amazing, the rears balanced with only two small .25 oz. weights, which is nothing.
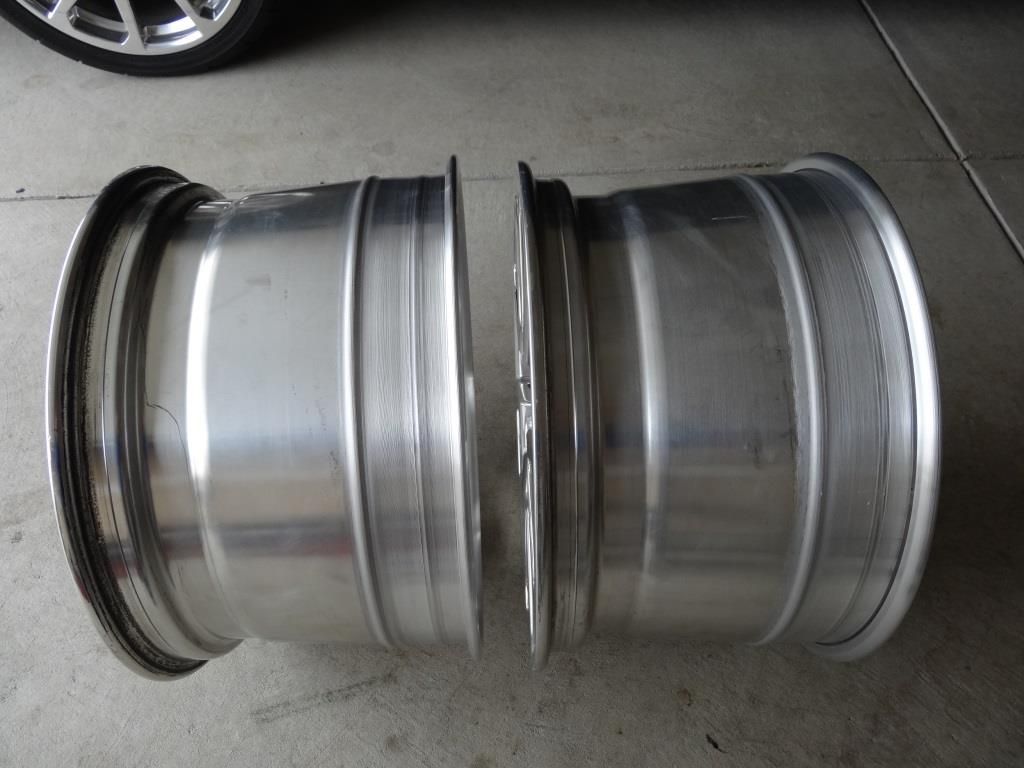
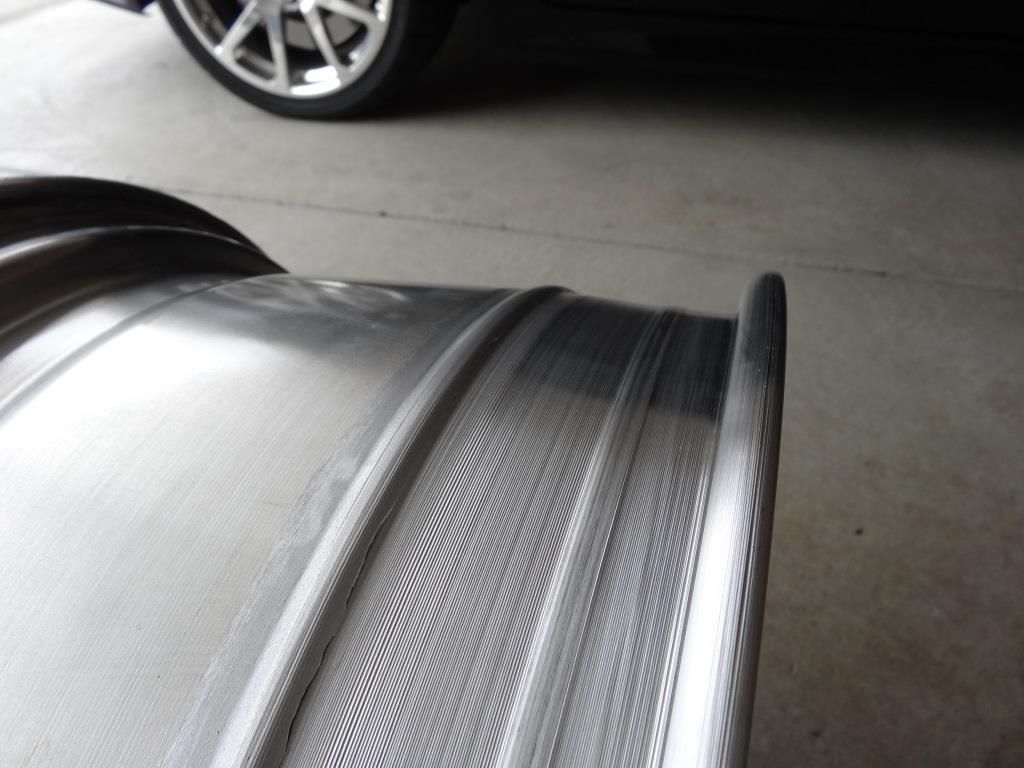

Now I think you guys will find this quite interesting, and I wish I would have paid more attention to how I took the pics of the rims on the weight scale to be more identifiable as the new widened rear rims compared to the 19” x 9.5” oem sedan rear rim is in fact lighter. But holding a 19” diameter rim on a bathroom scale while trying to take a pic is a bit challenging. But pay attention to the rim that weighs 26 lbs. which is the oem sedan rear 19” x 9.5”, if you look closely that exterior lip of the inside barrel of the rim is the stock lip of the 19” x 9.5” sedan rear rim. Compare that to how different the new lips of Eric Vaughn’s widened 19” x 11” rims are and you know it’s not the same. That’s the only identifier I can clarify for you because most of you won’t want to believe this but… The stock CTS-V Sedan Polished rear 19” x 9.5” rim weighs 26 lbs. and the stock CTS-V sedan front 19” x 9”, now mind you just been widened to 19” x 11” weighed in at 23.2 lbs. AFTER IT WAS WIDENED to 11”.
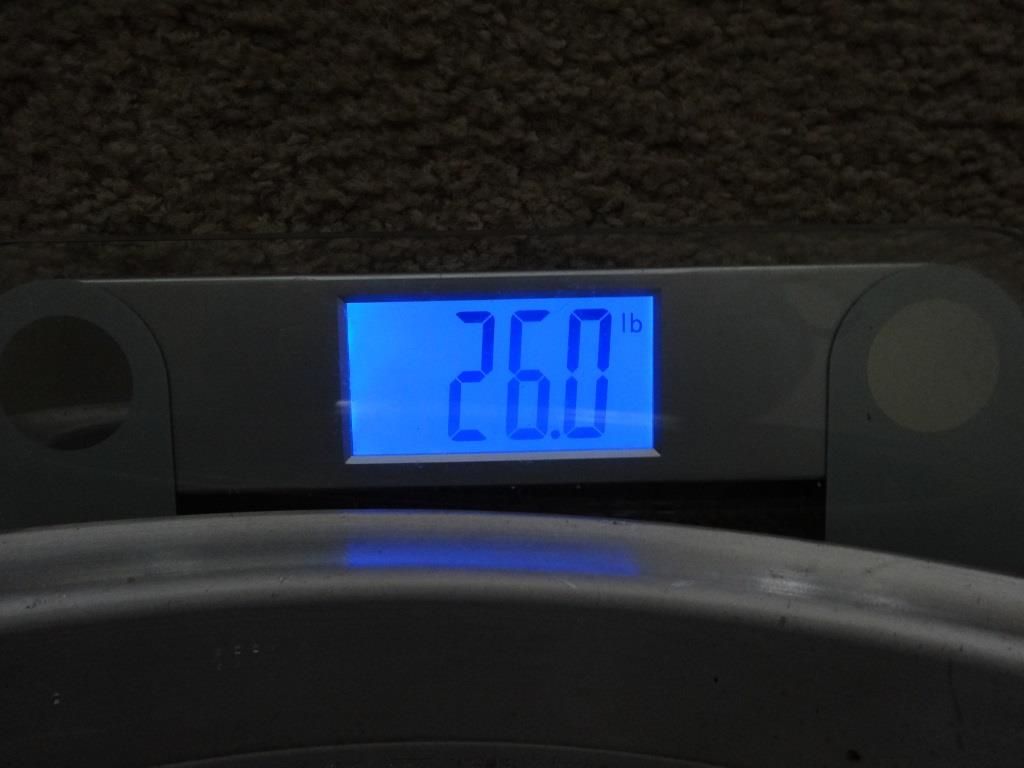

The only thing I can think of is Eric Vaughn uses top notch materials and must use very high quality rim barrels for his widening work. I think it is also a testament to the caliber of his work.
Once I received the rims back from Eric, I took them to The Wheel Warehouse (local wheel shop to me) to get refinished. I wanted something durable, easy to maintain, and looked good. I’ve never been much of a “chrome” guy, but the PVD finishes are awesome. I was considering the PVD Black Chrome hard, it looks good on any color and many other V’s on here have proved that. But once I seen it in person the Black Chrome finish they offered was very dark to me, almost too black. Some of you who have PVD Black Chrome rims your finish seems more anthracite or gun metal compared to how these were in person. This pic here shows how the stock CTS-V Polished rim compared to their PVD finish options. Top Rim: CTS-V Polished Rim Middle: PVD “Bright” Chrome Bottom: PVD Black Chrome.
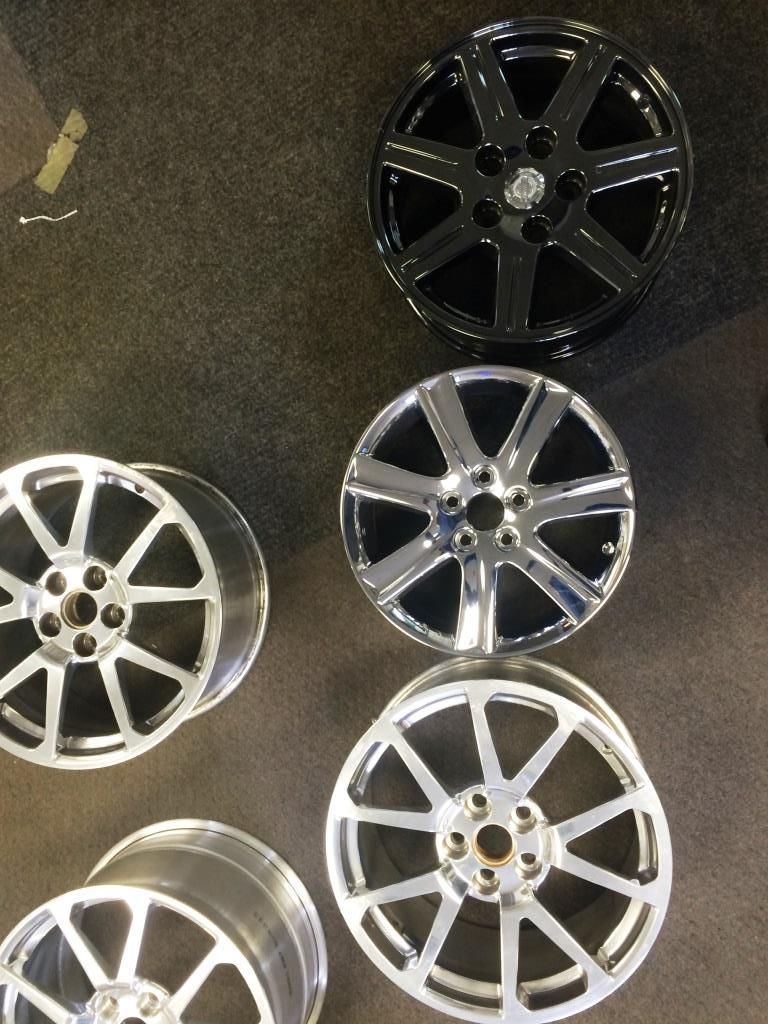
Now I have read that some shops that offer PVD finishes have a Black Chrome, then a “Super” Black Chrome, this shop only offered one Black Chrome and it was just too dark IMO. The black rims on black cars looks good, but let’s face it, it’s everywhere. I really liked how the PVD “Bright” Chrome looked in person, it was still a darker hue than the stock polished finish which is what I wanted, but not quite as dark as the Black Chrome so the PVD Bright Chrome is what I went with even though it is in fact not nearly as “bright” as traditional chrome plating.
Wheels refinished, now let’s mount tires…
Fronts are 285/35/19 Bridgestone RE-11’s mounted on the 19” x 9.5” Sedan Rear rims, which now used as my front rims. Tires are 26.9” tire diameter which is also the same size as the stock rear tires that come on the CTS-V sedan so tire diameter is the same.
Rears are 325/30/19 Bridgestone RE-11’s mounted on the sedan front 19” x 9” now widened to 19” x 11”, to be used as my rear rims. Tires are 26.7” diameter a bit shorter than stock tire height but not by much. Stock rear tires are 285/25/19 26.9” and 255/40/19 27.0” in the front. My new tire set up would be 26.9” front and 26.7” rear, not exactly the same, but similar to the stock tire diameter ratios.
Initial plan…
-Get longer wheel studs installed on all four corners, use 15mm spacers on rear and 11mm spacers up front and see where that landed my 325/30/19 rear inside the wheel well and use a fender roller and go from there.
Well I knew the 11mm’s up front with the 285/35/19’s wasn’t going to be an issue, others have used these spacers and some have used 15mm up front also (varying tire sizes) and there are a lot of V’s that have gone to a square wheel/tire set-up with 295/35/19’s on all four corners. And if you read the old thread posted in the beginning in the end they thought a 16-17mm spacer would be safe, so mine was 15mm hopefully it was in the ball park right?!?! WRONG! I knew better than to think that, after all getting these 325/30/19’s to fit on the rear of my sedan was going to be a millimeter game and I knew that, but I had bought these spacers a long time ago and was just hoping they’d work. I didn’t snap any pictures of the test fit of the 19” x 11” 325/30/19 rears with the 15mm spacer on the back but it was not going to work, and IMO neither was a 16-17mm. The inside lip of the rim (not the tire) the rim was making contact with the lip that is on the exterior of the lower spring seat (that’s what I’ll call it). The tire was also making solid contact inside the wheel well in front of rear trailing arm. So I immediately knew I needed more spacer, so I ordered 20mm slip on spacers w/ wheel studs build in. +5mm, already had the studs so that’ll be easier, it’ll be enough, and it was.
So then we mounted the 325/30/19 rear back on there and setting it down this is how it sat with the 20mm spacer:


Outside the fender, slight poke to the tune of exactly 2-3 8ths of an inch from outside of fender where the radius of the tread pattern meets sidewall is. Not to the outmost sidewall of the tire, I wanted the final fitment to be flush, and I also wanted to pull my fender the least amount necessary for proper fitment.
Inside I wasn’t touching anything but I was still VERY close to the fender liner, the lip of the lower spring seat, and the rear trailing arm. So for good measure I riveted the fenders similarly to the old thread referenced in the beginning of this post, and went at the lower spring perch and trailing arm with a die grinder, literally only “kissing” them to give me maybe 1-2mm of “just-in-case” clearance.
I wasn’t worried at all about shaving the trailing arm a bit, but the lip of the Lower Spring Seat is a bit of a sensitive area I feel, I initially wasn’t comfortable with touching it, but I had some conversations with a gentlemen who works at my local Tire Discounters who daily drives a V1, and has a C5 ZO6 he tracks. He shared with me that he has a close friend who tracks his V2 coupe and he informed me that they actually notched an “L” shape into his lower spring seat lip, some 5mm deep for inside wheel clearance and he has been beating that car on the track since with no issues. I was also in the company of some great mechanic friends, with welding and machining experience that inspected the areas of contact and what needed to be done very thoroughly and they were confident the 1-2mm window was not going to harm anything. That may not be enough confidence for some of you, but it was enough for me so we moved forward.
Lower Spring Seat:


The rear trailing arm is flat on the top and bottom, but rounded on the sides. So you’ll see in these pics we only gave the outside of the trailing arm a slight flatter surface on the outside instead of the round to give us maybe 1-2mm of additional clearance.
Rear Trailing Arm After kissed with grinder:


Rear Trailing Arm After:

Note: The outer lip of the Lower Spring Seat was also painted to match like seen here with the Rear Trailing Arm, but no pic of it after it was painted
Riveted Fender Liner:


Now to “massage” the rear fenders…
First of all the rear fenders of the CTS-V sedan do not have much of a lip protruding into the wheel well like some cars, there’s a lip there probably ½” in length, but it’s already angled upward some. At any rate I had already went at it with an Eastwood Fender Roller and a heat gun and made the inside lip of the fender more vertical, no angle into the wheel well, it was now “folded” upwards more, this may have gotten me 1-2mm if that. But I wanted to tuck and not rub; I wanted to pull the fender outward that 2-3 8ths of an inch so it would sit over the tire and not poke out.
This wasn’t my first experience in using an Eastwood Fender Roller; I had done it a time or two before with success. But that was for only rolling the inside fender lips, this was my first time attempting an actual fender pull with the roller. If you’ve never used an Eastwood Fender Roller there are all kinds of videos floating around of the proper way to do it. Best advice I can give here is be patient, do not attempt to do it without a heat gun, an infrared thermometer also helps, learn to use the adjustments of the Fender Roller it really is a great tool. From what I have found ideal temps for the fender are 120-150 degrees (that’s Fahrenheit for our international brethren). IMO the heat is what keeps your paint from cracking that and being patient, adjust wheel and arm angle a little more each time, make some passes, then adjust wheel and arm angle further out, make a few more passes, keep fender heated, work slowly.
Here are some progress pics:


National Speed: 2009 Cadillac CTS-V - Fitting a 325/30R19 on stock wheels... - LS1TECH
Although the forum link in that thread was pretty informative, it does leave out some items and I wanted to post a thorough thread on my experience of fitting 325/30/19 rear tires on my sedan successfully in case others are willing to take it on. This will be quite the “TriTexan” post with plenty of detail and pictures...(bustin’ your chops Tri, enjoy your posts and detailed input brother).
I apologize for the bandwidth consuming thread, and thorough detail, but for those interested in doing this mod you'll appreciate it.
This is not a bolt-on deal by any means, so if you want to do this, plan, prepare, and be patient.
There’s been many who have done the move the OEM CTS-V sedan rear 19” x 9.5” to the front and widen the OEM CTS-V sedan front 19” x 9” and move it to the back, my process with that was no different.
- OEM CTS-V Sedan front 19” x 9” sent to Eric Vaughn to be widened to 19” x 11”
- OEM CTS-V Sedan rear 19” x 9.5” to be used as new front rims
Eric Vaughn’s work is truly amazing, the rears balanced with only two small .25 oz. weights, which is nothing.


Now I think you guys will find this quite interesting, and I wish I would have paid more attention to how I took the pics of the rims on the weight scale to be more identifiable as the new widened rear rims compared to the 19” x 9.5” oem sedan rear rim is in fact lighter. But holding a 19” diameter rim on a bathroom scale while trying to take a pic is a bit challenging. But pay attention to the rim that weighs 26 lbs. which is the oem sedan rear 19” x 9.5”, if you look closely that exterior lip of the inside barrel of the rim is the stock lip of the 19” x 9.5” sedan rear rim. Compare that to how different the new lips of Eric Vaughn’s widened 19” x 11” rims are and you know it’s not the same. That’s the only identifier I can clarify for you because most of you won’t want to believe this but… The stock CTS-V Sedan Polished rear 19” x 9.5” rim weighs 26 lbs. and the stock CTS-V sedan front 19” x 9”, now mind you just been widened to 19” x 11” weighed in at 23.2 lbs. AFTER IT WAS WIDENED to 11”.


The only thing I can think of is Eric Vaughn uses top notch materials and must use very high quality rim barrels for his widening work. I think it is also a testament to the caliber of his work.
Once I received the rims back from Eric, I took them to The Wheel Warehouse (local wheel shop to me) to get refinished. I wanted something durable, easy to maintain, and looked good. I’ve never been much of a “chrome” guy, but the PVD finishes are awesome. I was considering the PVD Black Chrome hard, it looks good on any color and many other V’s on here have proved that. But once I seen it in person the Black Chrome finish they offered was very dark to me, almost too black. Some of you who have PVD Black Chrome rims your finish seems more anthracite or gun metal compared to how these were in person. This pic here shows how the stock CTS-V Polished rim compared to their PVD finish options. Top Rim: CTS-V Polished Rim Middle: PVD “Bright” Chrome Bottom: PVD Black Chrome.

Now I have read that some shops that offer PVD finishes have a Black Chrome, then a “Super” Black Chrome, this shop only offered one Black Chrome and it was just too dark IMO. The black rims on black cars looks good, but let’s face it, it’s everywhere. I really liked how the PVD “Bright” Chrome looked in person, it was still a darker hue than the stock polished finish which is what I wanted, but not quite as dark as the Black Chrome so the PVD Bright Chrome is what I went with even though it is in fact not nearly as “bright” as traditional chrome plating.
Wheels refinished, now let’s mount tires…
Fronts are 285/35/19 Bridgestone RE-11’s mounted on the 19” x 9.5” Sedan Rear rims, which now used as my front rims. Tires are 26.9” tire diameter which is also the same size as the stock rear tires that come on the CTS-V sedan so tire diameter is the same.
Rears are 325/30/19 Bridgestone RE-11’s mounted on the sedan front 19” x 9” now widened to 19” x 11”, to be used as my rear rims. Tires are 26.7” diameter a bit shorter than stock tire height but not by much. Stock rear tires are 285/25/19 26.9” and 255/40/19 27.0” in the front. My new tire set up would be 26.9” front and 26.7” rear, not exactly the same, but similar to the stock tire diameter ratios.
Initial plan…
-Get longer wheel studs installed on all four corners, use 15mm spacers on rear and 11mm spacers up front and see where that landed my 325/30/19 rear inside the wheel well and use a fender roller and go from there.
Well I knew the 11mm’s up front with the 285/35/19’s wasn’t going to be an issue, others have used these spacers and some have used 15mm up front also (varying tire sizes) and there are a lot of V’s that have gone to a square wheel/tire set-up with 295/35/19’s on all four corners. And if you read the old thread posted in the beginning in the end they thought a 16-17mm spacer would be safe, so mine was 15mm hopefully it was in the ball park right?!?! WRONG! I knew better than to think that, after all getting these 325/30/19’s to fit on the rear of my sedan was going to be a millimeter game and I knew that, but I had bought these spacers a long time ago and was just hoping they’d work. I didn’t snap any pictures of the test fit of the 19” x 11” 325/30/19 rears with the 15mm spacer on the back but it was not going to work, and IMO neither was a 16-17mm. The inside lip of the rim (not the tire) the rim was making contact with the lip that is on the exterior of the lower spring seat (that’s what I’ll call it). The tire was also making solid contact inside the wheel well in front of rear trailing arm. So I immediately knew I needed more spacer, so I ordered 20mm slip on spacers w/ wheel studs build in. +5mm, already had the studs so that’ll be easier, it’ll be enough, and it was.
So then we mounted the 325/30/19 rear back on there and setting it down this is how it sat with the 20mm spacer:


Outside the fender, slight poke to the tune of exactly 2-3 8ths of an inch from outside of fender where the radius of the tread pattern meets sidewall is. Not to the outmost sidewall of the tire, I wanted the final fitment to be flush, and I also wanted to pull my fender the least amount necessary for proper fitment.
Inside I wasn’t touching anything but I was still VERY close to the fender liner, the lip of the lower spring seat, and the rear trailing arm. So for good measure I riveted the fenders similarly to the old thread referenced in the beginning of this post, and went at the lower spring perch and trailing arm with a die grinder, literally only “kissing” them to give me maybe 1-2mm of “just-in-case” clearance.
I wasn’t worried at all about shaving the trailing arm a bit, but the lip of the Lower Spring Seat is a bit of a sensitive area I feel, I initially wasn’t comfortable with touching it, but I had some conversations with a gentlemen who works at my local Tire Discounters who daily drives a V1, and has a C5 ZO6 he tracks. He shared with me that he has a close friend who tracks his V2 coupe and he informed me that they actually notched an “L” shape into his lower spring seat lip, some 5mm deep for inside wheel clearance and he has been beating that car on the track since with no issues. I was also in the company of some great mechanic friends, with welding and machining experience that inspected the areas of contact and what needed to be done very thoroughly and they were confident the 1-2mm window was not going to harm anything. That may not be enough confidence for some of you, but it was enough for me so we moved forward.
Lower Spring Seat:


The rear trailing arm is flat on the top and bottom, but rounded on the sides. So you’ll see in these pics we only gave the outside of the trailing arm a slight flatter surface on the outside instead of the round to give us maybe 1-2mm of additional clearance.
Rear Trailing Arm After kissed with grinder:


Rear Trailing Arm After:

Note: The outer lip of the Lower Spring Seat was also painted to match like seen here with the Rear Trailing Arm, but no pic of it after it was painted
Riveted Fender Liner:


Now to “massage” the rear fenders…
First of all the rear fenders of the CTS-V sedan do not have much of a lip protruding into the wheel well like some cars, there’s a lip there probably ½” in length, but it’s already angled upward some. At any rate I had already went at it with an Eastwood Fender Roller and a heat gun and made the inside lip of the fender more vertical, no angle into the wheel well, it was now “folded” upwards more, this may have gotten me 1-2mm if that. But I wanted to tuck and not rub; I wanted to pull the fender outward that 2-3 8ths of an inch so it would sit over the tire and not poke out.
This wasn’t my first experience in using an Eastwood Fender Roller; I had done it a time or two before with success. But that was for only rolling the inside fender lips, this was my first time attempting an actual fender pull with the roller. If you’ve never used an Eastwood Fender Roller there are all kinds of videos floating around of the proper way to do it. Best advice I can give here is be patient, do not attempt to do it without a heat gun, an infrared thermometer also helps, learn to use the adjustments of the Fender Roller it really is a great tool. From what I have found ideal temps for the fender are 120-150 degrees (that’s Fahrenheit for our international brethren). IMO the heat is what keeps your paint from cracking that and being patient, adjust wheel and arm angle a little more each time, make some passes, then adjust wheel and arm angle further out, make a few more passes, keep fender heated, work slowly.
Here are some progress pics:


")


